how to draw a 3d spoon step by step
It is not hard to apply a simple or procedural material to an object. But it becomes much more complicated when the surface needs a certain texture displayed on it. Whatever texture map is put in the Diffuse slot of the fabric, but the results of rendering may be unpredictable. That'south why we demand to larn how 3DS MAX applies textures to 3D objects, what UVW Map is, and why you should "unwrap" information technology.
This article is written for those who are learning 3DS MAX, but already know the basics: interface, modeling, modifiers, and materials. This is a step-by-stride tutorial: we won't explicate what all the buttons are for, merely will prove the ones virtually commonly used.
Allow's beginning with a simple model of a dinner table. Its geometric shape will help us larn the standard tools. You can use any uncomplicated box or cylinder-shaped model to get clear and easy to run into results. Assign a uncomplicated material to information technology – depending on your rendering engine or cloud return farm you use, it can be Standard, VRayMtl, or CoronaMtl. Add a Bitmap to the Diffuse slot and apply a texture (you can too drag-and-driblet the texture into the slot). In our case, nosotros downloaded a free wood texture from Arroway Textures. In the Bitmap'southward settings, click the "Evidence Shaded Material in Viewport" checkbox, and the texture will become visible.
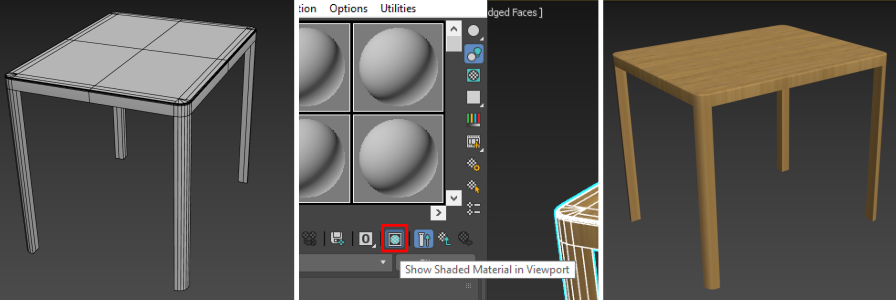
The texture is obviously too stretched and doesn't brandish properly on the sides and legs. By default, 3DS MAX tries to projection the texture on a 3D object as if information technology was a simple plane, and and then stretches the pixels on the edges for the height. To define how to properly display our texture, we demand a UV Map.
3D software "unfolds" the 3D object onto a plain surface and and then links each pixel with a matching pixel on the texture. The procedure of linking these pixels together is chosen UV mapping. In 3DS MAX, this is done through the UVW Map and Unwrap UVW modifiers. Later that you are gear up to use 3ds Max render farm to render your project.
UVW Map: for elementary shapes and objects
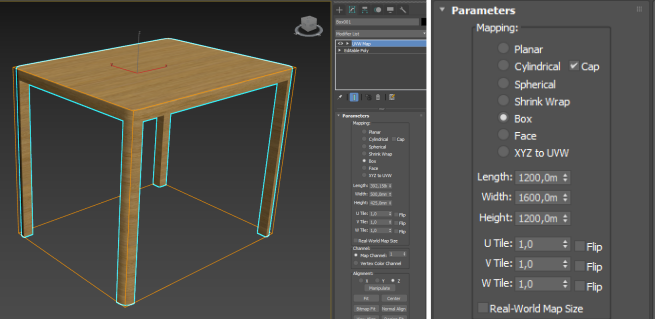
Apply UVW Map modifier to the object. Length, Width and Peak values control the size of the Gizmo of the texture project. When using square seamless textures ,nosotros can enter the size of the materials shown on the texture. It is easier when our material has sure elements for which we know the sizes (e.k. floor boards, bricks). This way, the size of the texture is calculated by multiplying the width/length of a single element by the number of elements. Otherwise, you have to estimate or judge the suitable values. Our texture'south size is 1200 x 1600 pixels, and we don't know the size of the material on it in millimeters (our system units). Allow's try putting these values in Gizmo sizes – 1200 x 1600 x 1200 mm. The result is good enough for our case. When guessing the values, make sure to keep the attribute ratio between dimensions abiding.
Note: if yous are using existing materials from Corona Fabric Library or VRay Textile Library, cheque the "Real-World Map Size" checkbox in UVW Map preferences. Texture sizes are already built into these materials, so you don't have to estimate them.
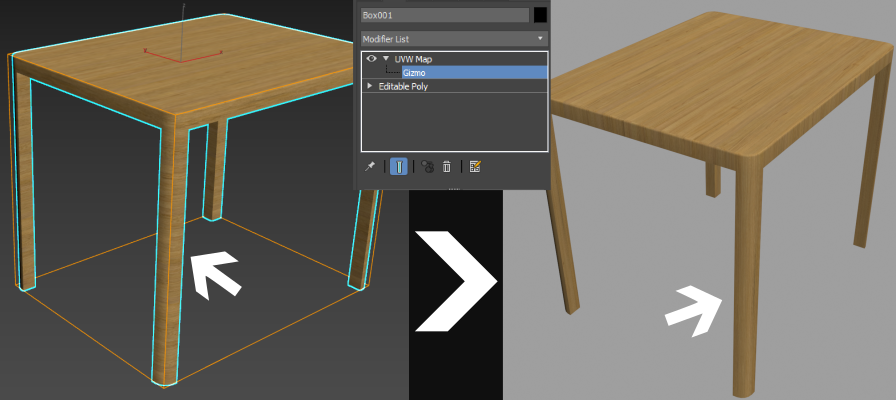
Our texture looks much better now, but it is rotated the wrong way on the table legs. The rotation of the texture is controlled by the object's Gizmo; to modify it, open up the modifier's scroll and select it. Y'all tin can move, rotate, or scale the Gizmo similar a normal object. Use the Angle Snap tool to turn Gizmo xc degrees by one of the axes (X or Y, depending on your object).
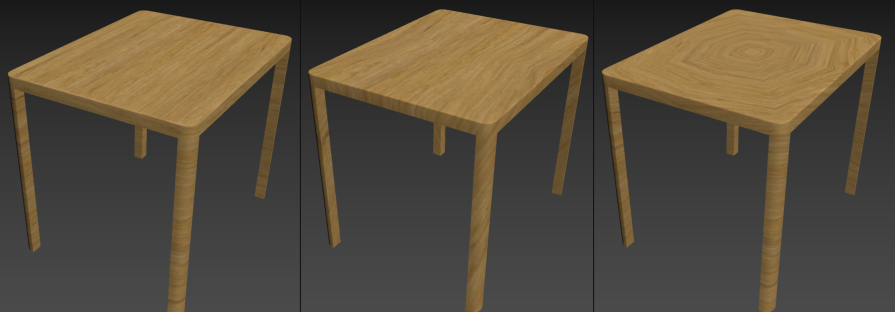
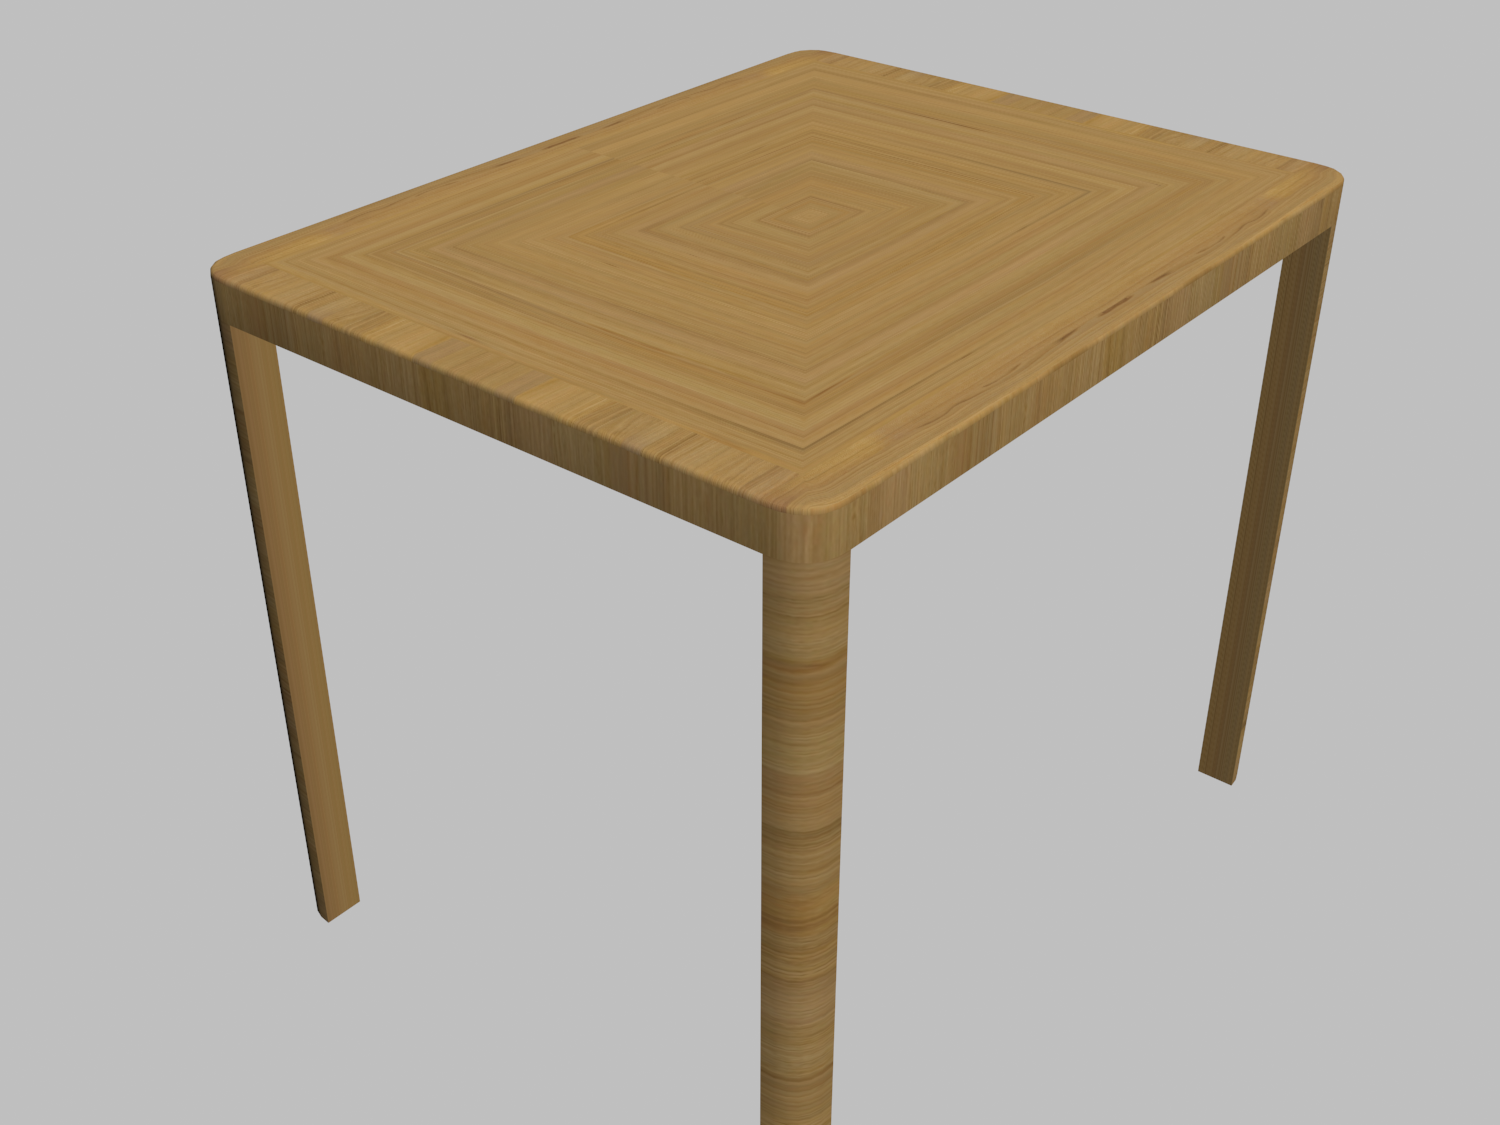
This is a expert issue for an object in the background, or away from the focus of the shot. Endeavor choosing different UVW Map types to see which one fits your object all-time. For example, here'due south how our table would look like if we utilize Cylinder, Shrink Wrap or Sphere projections.
Unwrap UVW: changing a UV map manually
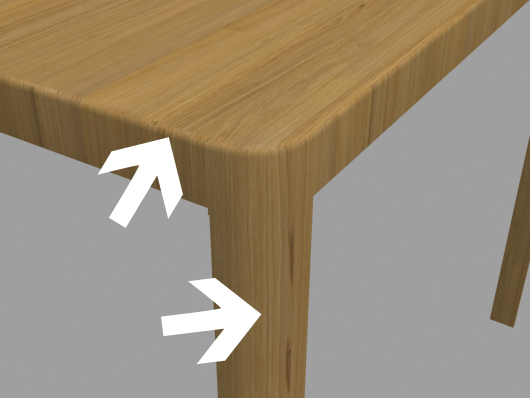
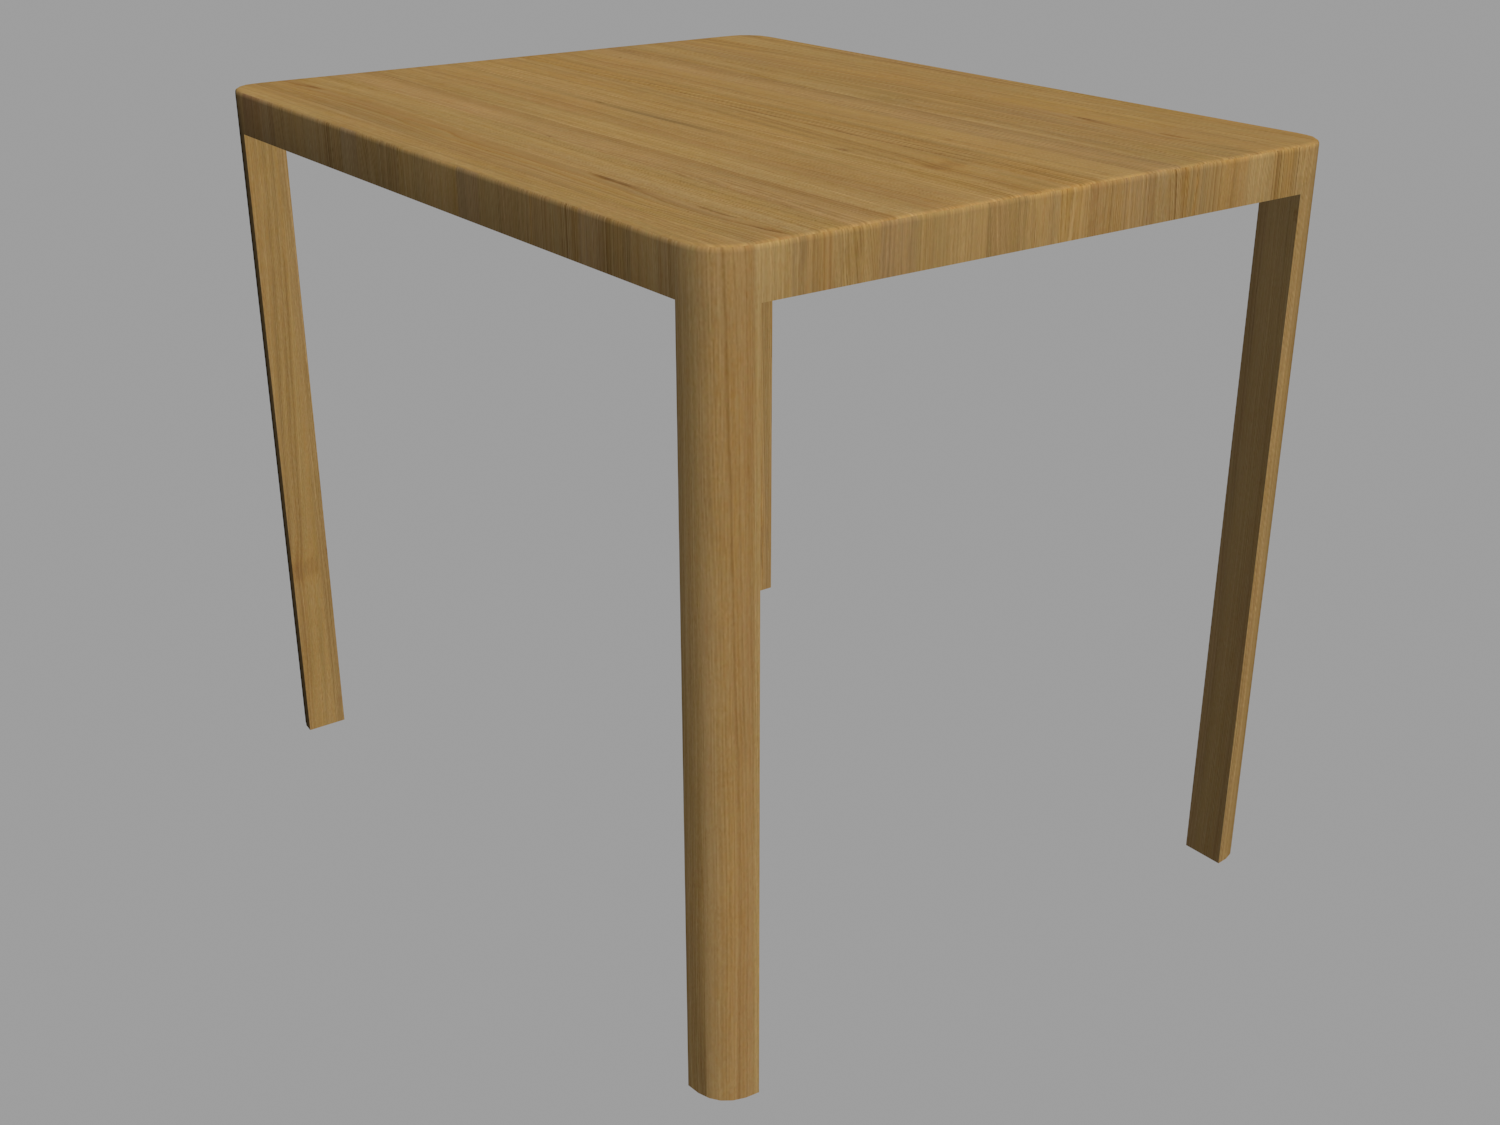
Our table has a simple shape, but the texture notwithstanding doesn't expect perfect after applying UVW Map. There is a seam in the centre of the leg, which will get more than visible once we modify the texture. The imperfections volition be fifty-fifty more noticeable if nosotros assign UVW Map to an object with many elements that don't fit standard gizmos. In this case, we need to use Unwrap UVW modifier instead.
Unwrap UVW has many tools for creating and editing the UV maps, and figuring out how it works is not that easy. First, let'south click the Open UV Editor button; here we tin see our current map. This one was created by UVW Map modifier applied right before Unwrap UVW. The map will be empty if the object was not created through basic primitives.
The elements of a UV map can be interacted with through Vertices, Edges and Faces, the aforementioned every bit in Edit Poly. If y'all pick a face up on the UV Map, information technology will become highlighted in the viewport, and vice-versa. To select the whole UV Map chemical element, use the "Select By Element UV" toggle switch, located next to the Faces icon. This can be used with whatsoever option mode.
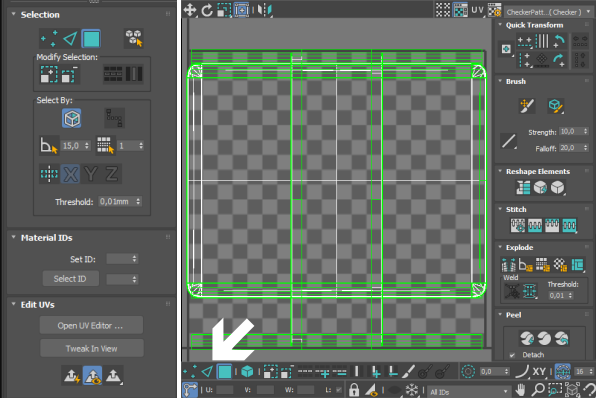
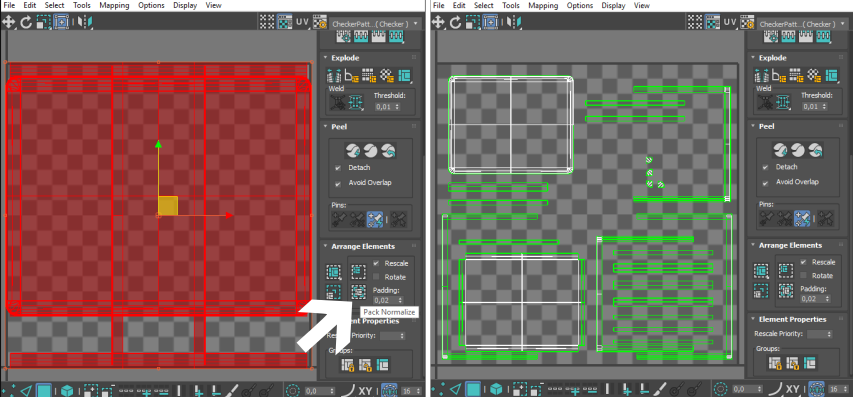
Right now, all of the map elements are stacked on top of each other, and it is hard to figure out which is which. Select all the polygons (Ctrl+A or through expanse selection) and click "Pack Normalize". The elements are now spread out on the whole map, and we can edit each separately.
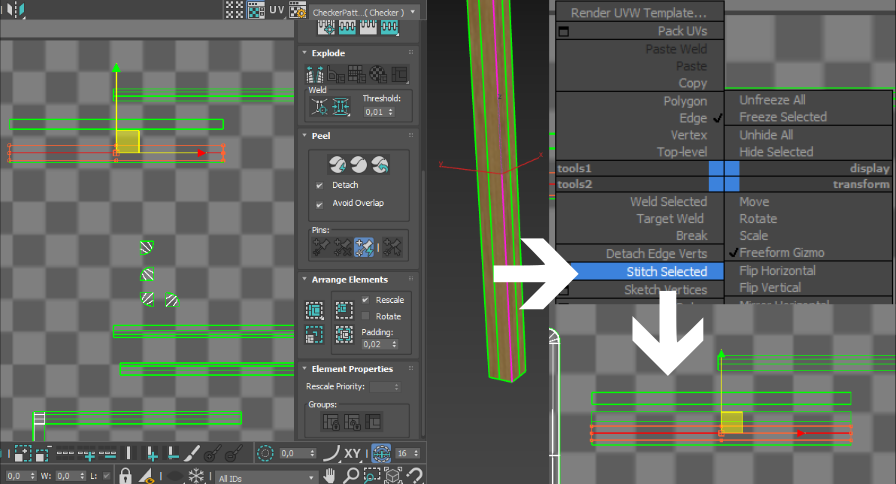
Try clicking dissimilar polygons to see them highlighted in the viewport. You lot can run into that the table legs are divided into several elements, which is why we see a seam in that location. Let'south stitch them together. Selection an border in the heart – it will exist highlighted in red, while the adjacent one will become blue. Right-click the highlighted edge and select Sew together Selected. The elements will connect, the edges volition become one and the seam will disappear.
Keep stitching the edges together wherever you want to remove the seams. It's not always possible, and sometimes you may brand a wrong determination. If the unwrapping didn't turn out that well and you can no longer undo it, merely delete the modifier and showtime over. In our example, nosotros left the bottom of the tabular array separate from the peak, and stitched together the sides and legs of the table in two parts.
After the elements are stitched together, select all the polygons in one case again and click Pack: Custom. Now the elements are packed together, without intersecting, and fit neatly into the texture. Notwithstanding, we want to come across our wood texture instead of checkers, so let's select it in the top-right corner menu. Ideally, you'd use a seamless texture – this style you tin can scale all the texture elements outside the bounding box to set the proper size. In our instance, the event is good enough.
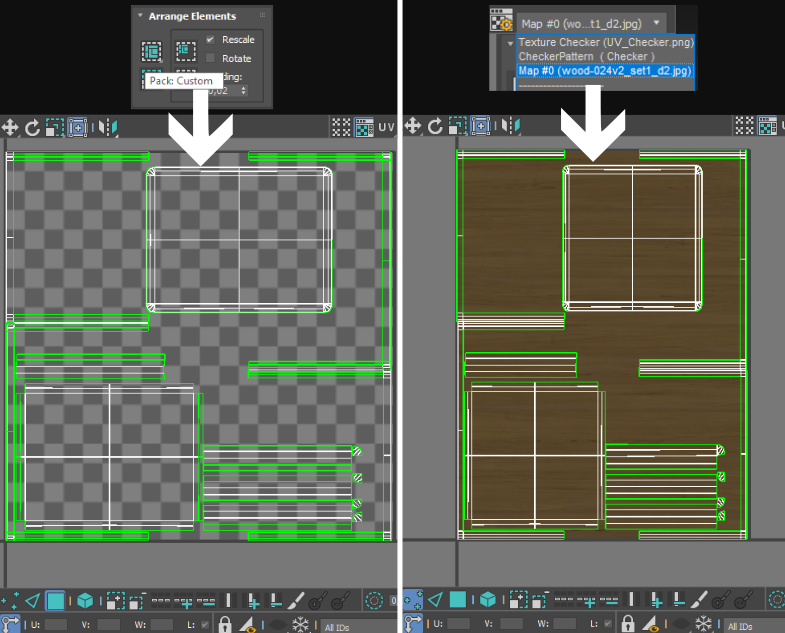
Here is our result so far:
NOTE: You tin can create an interesting material layout by using several UVW Map modifiers for dissimilar faces selected in Edit Poly. For example, this is what you tin can go by applying Cylinder gizmo to tabular array legs, box to the sides, and sphere to the peak surface.
Unwrap UVW: creating a UV map from scratch
Information technology's non productive to start stitching elements manually when you lot have a complex object. UVW Map modifier doesn't work well with shapes exterior the primitives: it creates seams in the heart of the elements, cuts them in unexpected places, and complicates the already painstaking work. Standard Unwrap UWV tools commonly split an object into also many elements (try using Tools → Flatten Mapping to see an example). In such cases, it is easier to cutting your own seams.
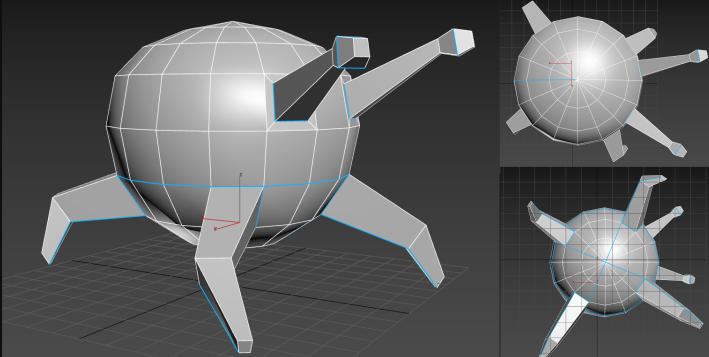
Lets accept a depression-poly model of this creature, which we are going to telephone call Crabby. Apply checker texture to information technology using UVW Map with a Sphere gizmo.
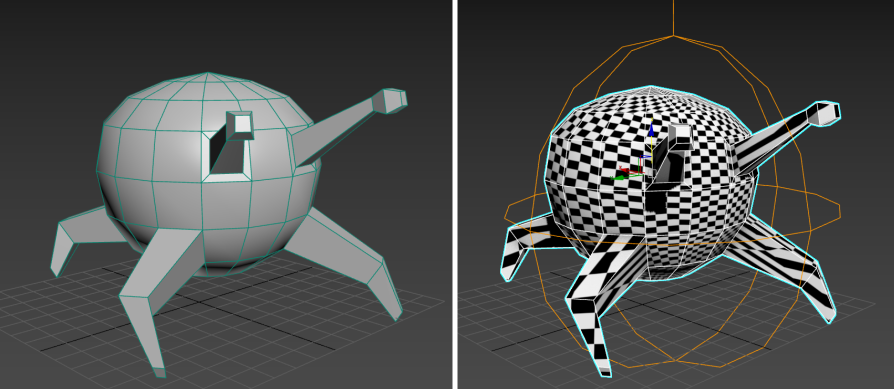
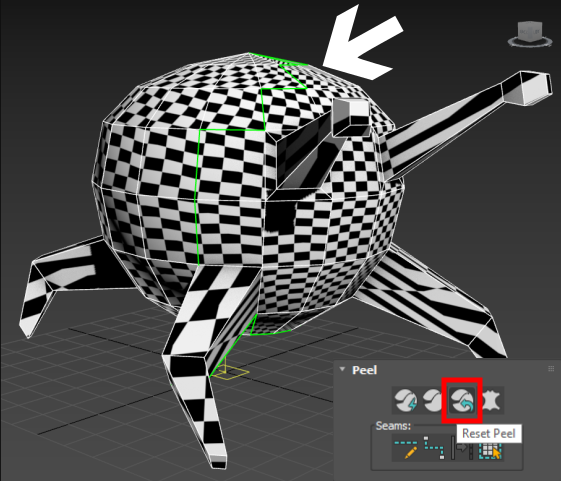
The texture is all stretched on Crabby'south legs and optics because these elements don't fit into the sphere. Information technology is ameliorate to texture them separately from the rest of the body. Employ Unwrap UVW to encounter light-green stitches in the viewport created by UVW Map. We don't need them, so let's click Reset Skin to clear the UV map.
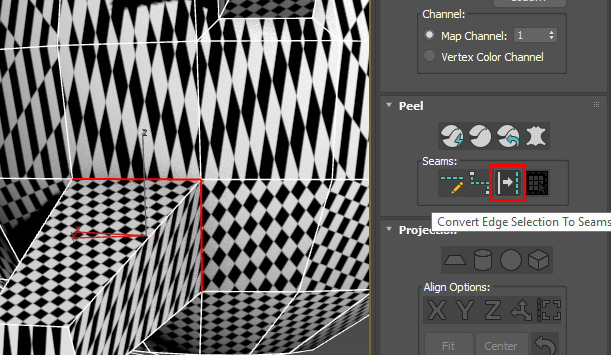
Now let's create new stitches. Pick the edges you desire to get stitches and click Convert Border Choice to Seam. Make the seams run around each leg and eye stalk, on Crabby'southward belly and dorsum. You may have trouble figuring out the right place to cut at kickoff, but don't give up. Remember the Reset Peel tool if you don't like your effect and would rather first over.
Our seams look similar this:
NOTE: To larn how to correctly cut complicated 3D models into patches for unwrapping, you'll have to practice a lot. Think about texturing when you are modeling your object and pay attention to places where you lot'll be able to run stitches through later on. Unwrap low-poly models: information technology ways you will have less polygons to worry about; the UV Map volition work simply fine later applying Turbosmooth.
Afterwards marking all the seams, choose a polygon on the surface and click Expand Polygon Selection to Seams. It selects a whole element limited past our new seams. With this selection, click Quick Peel – and you lot'll create a UV map of this element. Yous can pick all the elements at one time and the UV map will be created for all of them, but nosotros are trying to make certain we have made enough seams, so let'due south echo these actions for each chemical element separately. Turns out nosotros need i more than seam for the heart stalks, otherwise the unwrapped element gets deformed. Undo the unwrapping, create a new seam, and try again.
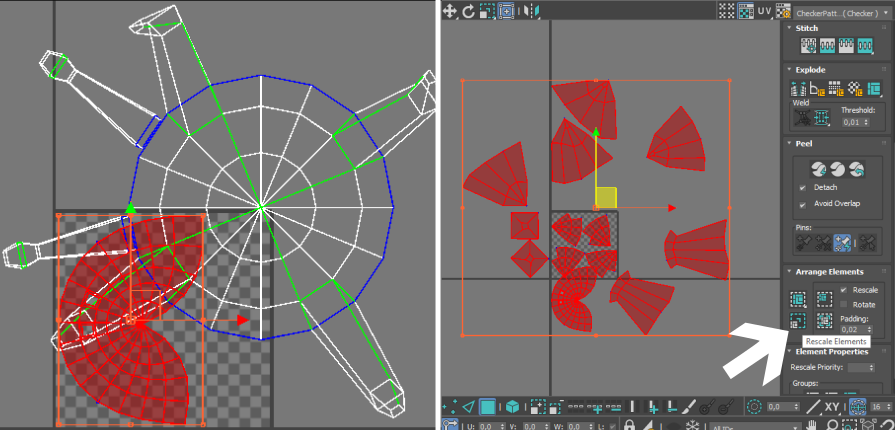
All the elements are now unwrapped, but they are manifestly non scaled properly. Select all the faces and click Rescale Elements to ready it.
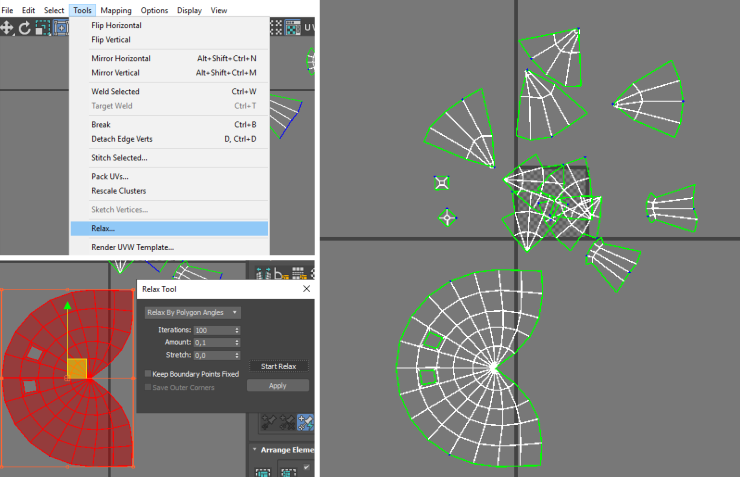
The faces on Crabby'southward body look also stretched on the edges. Select the element, open the Tools menu, and choose Relax. Click Beginning Relax – the faces gradually commencement changing their shapes and locations to fit the original model amend. When information technology starts looking skilful, click End Relax and Use. If the UV map contains knots and overstretched polygons, use college values of Stretch and Amount – this will fasten the relax procedure. Use Relax to all the other elements of our map for practice.
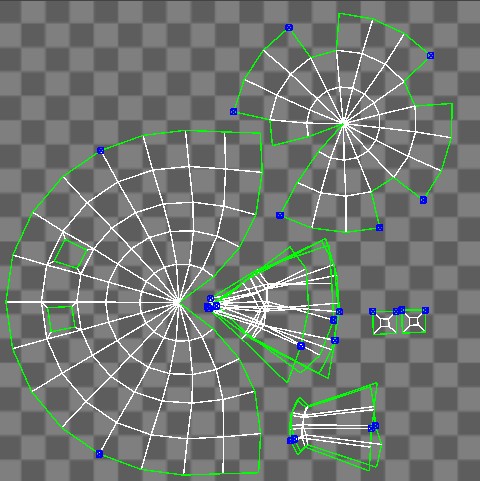
The final UV Map should fit into the texture, so select all the faces and click Pack: Custom. Some of the elements that don't need unique textures can exist put one on top of the other to save space. Let's pack together Crabby's legs and center stalks, but get out the eyes separate to later colour them with different shades. Call up that you can movement and rotate elements to brand them fit together better. But if you want to scale them, practise it for all the elements simultaneously, or they'll lose relative proportions.
Turns out we made also many seams on Crabby's belly, then let's stitch them together through Sew together Selected. Our final UV map looks like this:
To depict our texture, let's export this map. In the Tools carte, choose Return UVW Template. You can set the image size, color, and thickness of the lines in the opened window. Click Render UV Template and save the image in whichever format you lot like best. Now nosotros can draw a texture for Crabby in any drawing application.
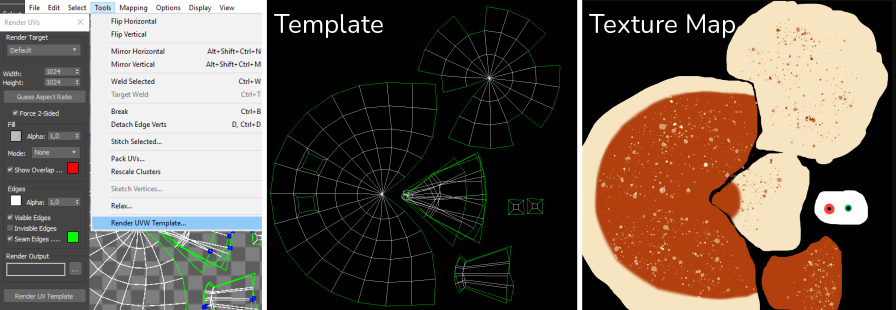
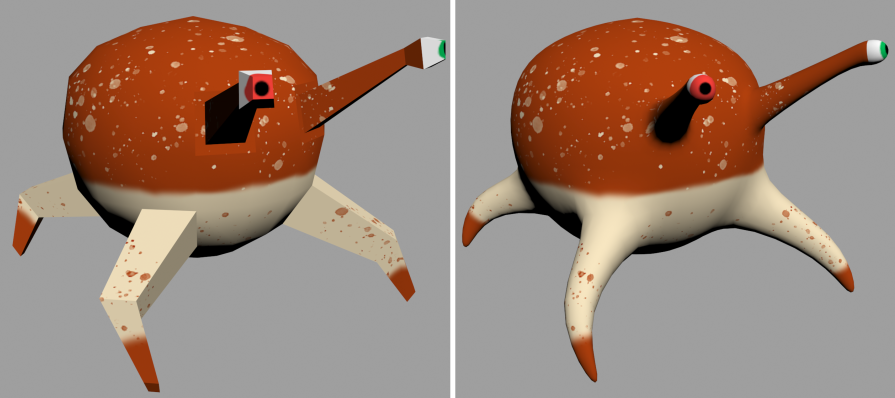
Create a new material with this map in the Diffuse slot and apply it to the model. Crabby is finished! The UV map works for both low-poly and high-poly models.
In this tutorial, we've learned how to create UV maps in three different ways. In practise, they tin exist used all together or separately. Every 3D artist or studio develops their own pipeline for unwrapping. Practice and experiment more to find the workflow that suits you the all-time. Adept luck!
boughnercablecony.blogspot.com
Source: https://megarender.com/blog/uvw-map-and-unwrap-uvw-a-step-by-step-guide/
0 Response to "how to draw a 3d spoon step by step"
Post a Comment